

This year we decided to start a ‘Year-Round Tree’ and decorate it for each holiday and season. Because of that, we now decorate the entire dining room. Oops! Anywho… I have had a blast finding different DIY decorations for each display.
I am sure you have seen plenty of pictures of these gorgeous little glitter balls, but do you know just how easy they are to do yourself?! Now if you are anything like me, you are one of those who gets anxiety just at the thought of trying something new for fear of failure. Then, once I’ve tried it, I normally feel ridiculous because it was way easier than expected. Well, that is exactly what happened with these… I have been wanting to test out some glitter ornaments for quite some time and finally did. So, if you are reading this and you feel the same, just do it! These are so incredibly easy, but possibly a little messy.

Materials Needed
- Clear Gloss Polyurethane, Water Based
- Glass or Plastic Ornaments
- Glitter of Choice
- Two Funnels (Must fit in Ornaments)
Step One: Prep Your Workspace
This is my BIGGEST tip for starting anything, from crafting to cooking. Have a clean and organized workspace. That doesn’t mean just shove everything over to create a little area to work, straighten it up and put everything in its place.
Once your area is clean, get EVERYTHING out that you need. All your materials, a mat to work on if necessary and even your cleaning supplies. With all of that within reach, you should have minimal hiccups and move along more quickly.
Now that you have all your materials, set up your station as needed. I used a silicone mat under my work area, because no matter what I do… it ends in spills and messes. Hence why I am trying to keep it as clean as I possibly can, less for me to clean up at the end!
Step Two: Remove Caps
I highly suggest removing all the caps before you start so you aren’t wasting time in between ornaments fumbling with them. Once you’ve removed them, if possible, place them back in the container you bought them in for easy organization. (Keep that station clean along the way!)

Step Three: Add Polyurethane
The fun begins! Start by placing your ornament in two a small bowl or something to keep it from sliding around. We used these bowls, the ornaments sat perfectly inside with no slippage.
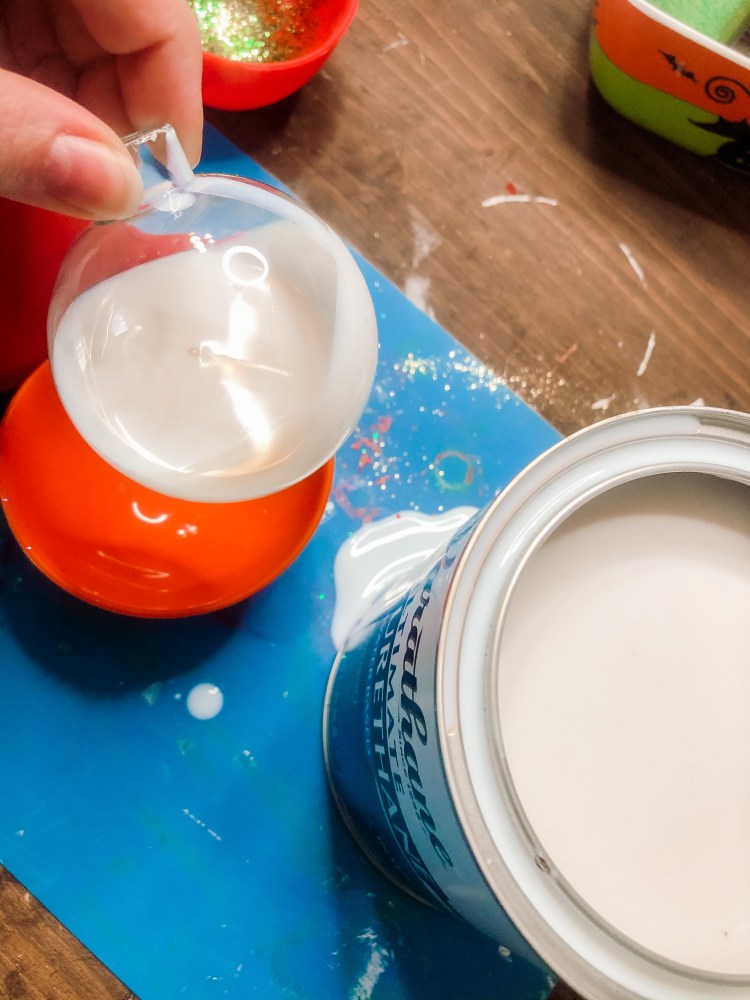
Here we can get a little messy. Carefully slide your first funnel into your ornament and pour a small amount of polyurethane into the ornament. If you pour straight from your poly can make sure you have something underneath for the drippage.
Once you have your poly inside, gently swirl your ornament to coat the entire inside, making sure to get the neck too. After you have coated the entire ornament, pour out the excess poly. It’s okay if you didn’t add enough the first time, add more and continue. If you do not plan to use the poly for anything other than crafting, feel free to pour the excess back in to the can.
After they are coated, place them upside down to drain any excess coating. If you can, place a folded-up paper towel to the container you bought them in and let them sit while you coat the rest. I suggest working about 3-4 at a time to make sure your polyurethane doesn’t get tacky before you add the glitter.


Step Four: Add Your Glitter
Grab your second funnel and your glitter of choice. For ours, we used emerald green and gold extra fine glitter. Feel free to use any type, just expect different results with different sizes of glitter. Add about a tablespoon or so of glitter and gently swirl it around the ornament just like you did the polyurethane.
Empty any excess glitter back into the glitter jar. Place your ornament back in the resting place to dry completely, times will vary depending on your brand of polyurethane.
Once completely dry, carefully slide your caps back into the ornaments and enjoy!


*Side note – do not worry when you notice the milky color of the polyurethane, it will dry clear. They will look slightly dull while they dry and become sparkly once dry! Below is an example the bottom left one is completely dry, the rest are still drying.

